DMS
DMS
DMS Overview
The Deployment Management System (DMS) enables administrators to have complete control of deployments from anywhere. Configure diagnostic devices, clinical offerings, administrative and patient forms, and debug devices remotely.
Device Management
Devices Overview Page
The devices overview page lists all the devices in the deployment. At a glance, you can get valuable information about each device:
-
If the device has any alerts
-
The current status of the device
-
The name of the device
-
When the system last detected the device
-
The device ID
-
Which configuration is the device has assigned
-
The current location
To view specific information about the device, click on the Device Name


Device Details
t each device:
Status
The devices overview page lists all the devices in the deployment. At a glance, you can get valuable information about each device:
-
If the device has any alerts
-
The current status of the device
-
The name of the device
-
When the system last detected the device
-
The device ID
-
Which configuration is the device has assigned
-
The current location
To view specific information about the device, click on the Device Name
Configurations
Configurations


Multiple deployments at the same time - NEW!
If you manage multiple deployments, you may run them all at once using the "Careprovider" option in the "Generate For" dropdown. This will return a report with device usage from every device on every selected Care Provider.
-
Log in to the reports portal at identity.19labs.com/login/rp
-
Select "Create Report"
-
Generate for is "Devices" by default. Select "Careprovider" from the dropdown
-
Note: if you manage only 1 Deployment, this option may be hidden. See Devices on a single deployment for more options
-
-
Select Care Providers for the report
-
Individual Care Providers: use the checkbox beside the device name
-
All Care Providers: use the checkbox at the top to select all
-
Note: Every device will be reported on from each selected Care Provider.
-
-
Report type is "Usage Report" by default.
-
Select the appropriate report option from the dropdown
-
-
Date range is "Yesterday" by default
-
Select the appropriate date range from the dropdown
-
-
Select "Run Report"
-
Options for the report once it's run
-
Sort the columns by clicking on the column title
-
Export the report as a CSV and upload it where desired
-
Copy and paste straight from reports into a formatted spreadsheet
-


Clinics
Saving a report setting
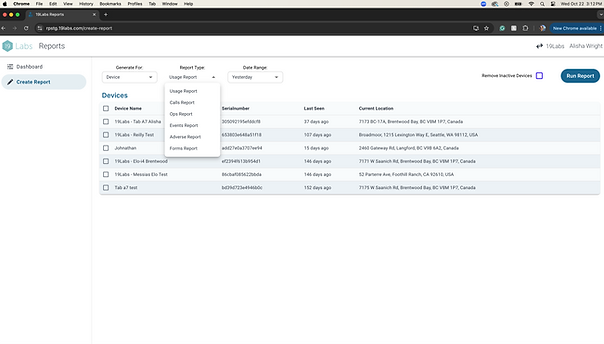
If you find yourself creating the same report every day (e.g., Usage report for Yesterday) you can save these report settings for quick and easy access.
-
Log in to the reports portal at identity.19labs.com/login/rp
-
Select "Create Report"
-
Generate for is "Devices" by default. Select "Careprovider" if appropriate.
-
Note: if you manage only 1 Deployment, this option may be hidden.
-
-
Report type is "Usage Report" by default.
-
Select the appropriate option from the dropdown:
-
Usage
-
Calls
-
Ops
-
Events
-
Adverse
-
Forms
-
-
-
Date range is "Yesterday" by default
-
Select the appropriate date range from the dropdown
-
-
Select "Remove Inactive Devices" if desired
-
Select "Run Report"
-
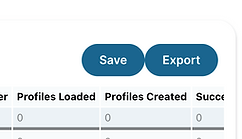
Select "Save Report"
-
Give the report a meaningful name. E.g., Usage report - Yesterday


Forms
Saving a report setting
If you find yourself creating the same report every day (e.g., Usage report for Yesterday) you can save these report settings for quick and easy access.
-
Log in to the reports portal at identity.19labs.com/login/rp
-
From the Dashboard, select your saved report from the list
That's it! The report will run with the settings that were saved.


Manage Users
Export a report
If you would like to save a report, there are a few ways to do this.
-
Run the report - how to
-
Export the report
-
Option 1: Click the "Export" button on the top right of the report
-
This will export a CSV file
-
You can open this in your preferred spreadsheet program (Excel, Google Sheets etc.)
-
-
Option 2: Copy the report directly from the page into your preferred spreadsheet program
-
-
In your preferred program, use conditional formatting, filters, and other visual queues to call out specific information
.png)
.png)
